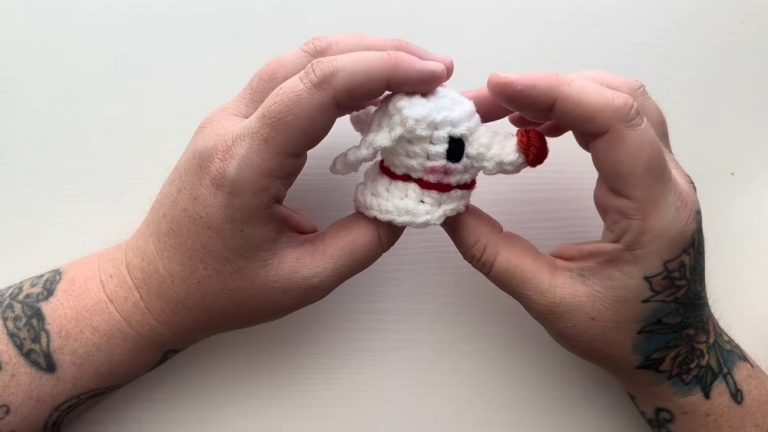
Free Crochet Deadpool Superhero Amigurumi Pattern
Prepare for some quirky with crochet Deadpool Superhero Amigurumi, and create your very own cheeky Marvel antihero!
This pattern is perfect for both experienced crocheters and adventurous beginners looking for a unique project. Its big black with white hole eyes make it more scary. Crocheting your own little doll not only results in a delightful keepsake but also enhances your crochet skills.
Crochet Deadpool Amigurumi

This handmade figure can serve as a fantastic gift for comic book enthusiasts, a quirky desk ornament, or an amusing addition to a superhero collection. Working on this pattern is a therapeutic activity, offering a break from screens and fostering creativity. Moreover, it allows you to customize colors and details, making each creation uniquely yours.
Pro Tip for Best Results
To achieve a more polished look, use a smaller crochet hook than suggested for your yarn weight. This helps create tighter stitches, ensuring your Deadpool comes out neat and firm.
Materials Needed:
- Worsted weight yarn in black and red
- A pair of scissors
- Yarn needle
- F (3.75 mm) crochet hook
- Felt in black (and possibly white)
- Felting needle
- Polyfill for stuffing
Deadpool Crochet Pattern:

Legs (Make 2):
Start with Red Yarn:
- Make a magic ring.
- Chain 1, then create 8 single crochets (SC) into the ring.
- Pull the ring closed.
Round 2:
- Increase in each stitch around by making two SC in each stitch for a total of 15 SC.
Round 3:
- 15 SC around in red. (No increases for this round.)

Color Change to Black:
- On the last stitch of Round 3, pull up a loop but do not complete the stitch. Attach black yarn and complete the stitch with it.
Round 4:
- 15 SC around in black.
- Repeat these steps to create the second leg.
Body:

Merge Legs:
- Join legs with a single crochet.
- Create 30 SC around both legs, connecting them into one piece.
Close Gaps:
- If there’s a hole between the legs, use the yarn needle to stitch it closed.

Continue Body:
- Continue with red yarn, SC around, following the pattern’s instructions for color changes and shaping until the body is complete. This will include multiple rounds with specific increases and decreases to shape the body, as well as color changes back to black yarn instructed by the pattern.
Head:

Start with Red Yarn:
- Make a magic ring.
- Chain 1, then 6 SC into the ring.
Increase Rounds:
- Follow the pattern for several increase rounds until you have created the base size of the head.
Steady Rounds:
- Work a number of rounds with no increases to build the head’s sides.

Decrease Rounds:
- Begin decreasing rounds to shape the top of the head, following the pattern exactly as decreases are distributed to maintain roundness.
Stuff the Head:
- Stuff the head firmly with polyfill before closing.
Arms (Make 2):

Start with Black Yarn:
- Make a magic ring and follow the pattern for increasing, then straight rounds, and a final color change to red towards the wrist.
Finish with Red:
- The arms will finish on red rounds to mimic Deadpool’s costume sleeves.
Assembly:
- Sew the head to the body.
- Attach arms.
- Sew or felt features such as the eyes and any other costume details using felt cutouts and a felting needle for precision.
Eyes and Details:
- Cut out felt shapes for the eyes and use the felting needle to attach them securely to the head. If necessary, additional costume details like belts or weapon holders can be similarly created with felt and sewn or felted on.