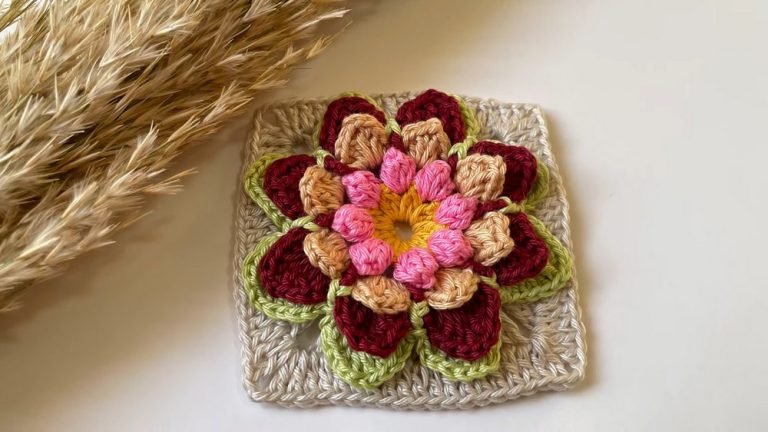
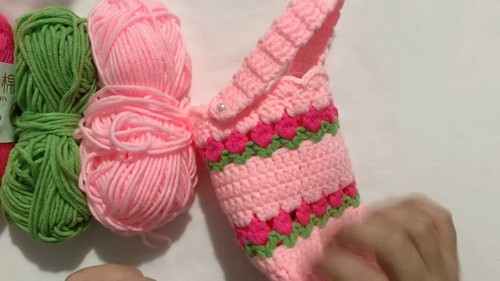
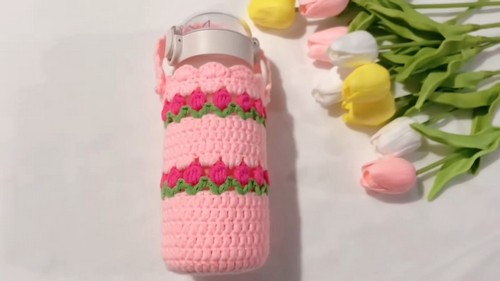
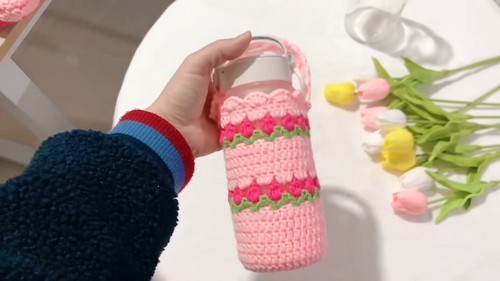
Stylish Crochet Water Bottle Holder Pattern With Pink Flower
Spice up your hydration routine with the Free Crochet Water Bottle Holder Pattern, adding a splash of fun and flair to your day!
This pattern epitomizes the fusion of elegance and practicality, making it a standout accessory for anyone on the go. Created with meticulous attention to detail, this holder offers a delicate yet sturdy design that securely fits most standard water bottles. The charming pink flower pattern adds a touch of sophistication, making it not just a functional item but also a fashionable statement. Perfect for outdoor adventures, gym sessions, or simply daily errands, it ensures you stay hydrated in style.
Crochet Water Bottle Holder Tutorial
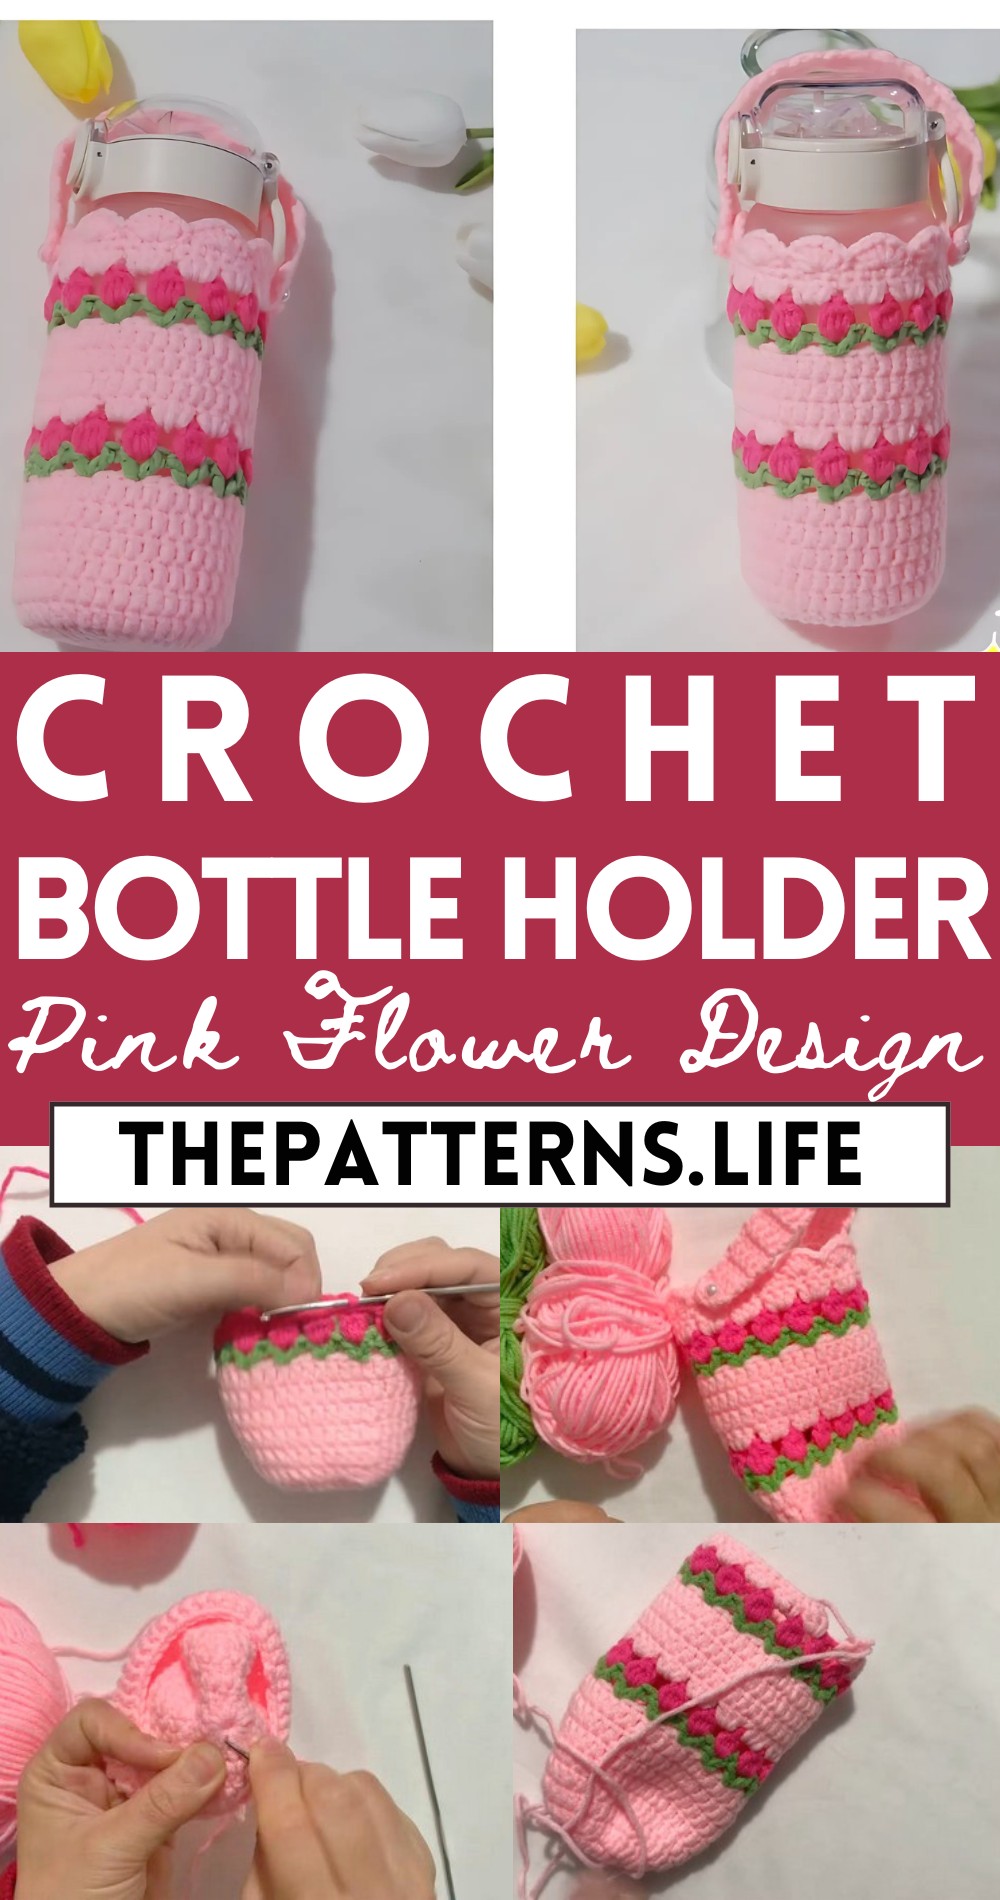
Its ergonomic design includes an easy-to-carry strap, making it convenient to tote around wherever life takes you. Ideal for personal use or as a thoughtful handmade gift, this chic holder is the perfect blend of form and function.
Tip:
For added durability, consider using a strong, washable yarn to maintain the holder’s beauty and longevity.
Materials Needed:
- Three colors of 5-ply yarn
- 3mm crochet hook
- Stitch marker
- Needle
- Scissors
Pattern Steps:
Starting Row:
- Foundation and First Row:
- Make a magic ring.
- Chain 2 (counts as the first double crochet).
- Make 15 double crochets into the magic ring, including the chain 2.
- Pull the magic ring tight and close with a slip stitch into the first stitch.
Increasing Rows:
Second Row:
- Turn the work.
- Into each stitch around, make 2 double crochets.
- Close the row with a slip stitch into the first stitch.
Third Row:
- Chain 2 to start.
- 1 double crochet in the first stitch, 2 double crochets in the next stitch. Repeat from * to * around.
- Slip stitch into the first stitch to close.
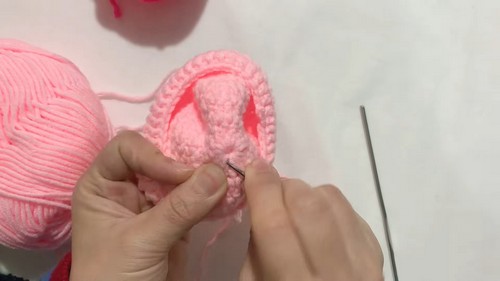
Creating the Body:
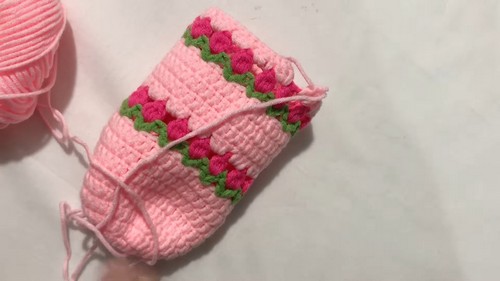
Rows 4-9:
- Chain 2 at the beginning of each row.
- Make 1 double crochet into each stitch around.
- After row 9, cut the yarn and use a needle to weave in the ends securely.
Adding the Leaves:
Leaf Creation:
- Attach a new color yarn.
- Chain 3, make a double crochet in the same stitch, skip 2 stitches, then make a slip stitch into the next.
- Repeat from to for each leaf around the edge of the circle.
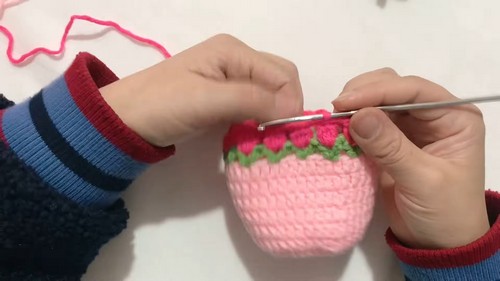
Making the Flower:
Flower Petals:
- Attach a new color yarn.
- Make a slip knot, yarn over, insert the hook between the double crochets, pull a loop, yarn over and through to form a chain of 3 stitches.
- Loop 5 times to create the petal and close with a chain 3, then slip stitch.
- Repeat for each petal around.
Creating a Strap:
Strap Creation:
- Chain 6.
- Turn, make a double crochet into the third chain from the hook and each chain across (4 double crochets total).
- Chain 1, turn, make 4 double crochets across for the strap.
- Repeat from to until the strap reaches the desired length.
- Attach the strap to the buttonholder or add a button as desired for closure.
Final Touches:
Edging:
- Single crochet around the outer edge for a neat finish.
- For creating a ruffled edge, skip one stitch, make 5 double crochets in the next stitch, skip one stitch, slip stitch in the next stitch.
- Repeat from to around.
- Secure and weave in all ends.