
Crochet Cute Waistcoat Stitch Step By Step Guide
Let go the charm of the Crochet Cute Waistcoat Stitch Pattern—perfect for adding a chic and stylish touch to your handmade garments and accessories!
Add a touch of whimsy to your crochet repertoire with the Crochet Cute Waistcoat Stitch Pattern! This pattern mimics the look of remarkable knit-like texture creating a dense and durable fabric perfect for crafting comfy garments, adorable accessories, and snuggly home decor.
Crochet Waistcoat Stitch

The waistcoat stitch, with distinctive and versatile appearance, is ideal for projects requiring a little extra warmth and style. By working single crochet stitches into the post rather than the top, you achieve a lovely woven effect that’s both fun to make and pleasing to the eye.
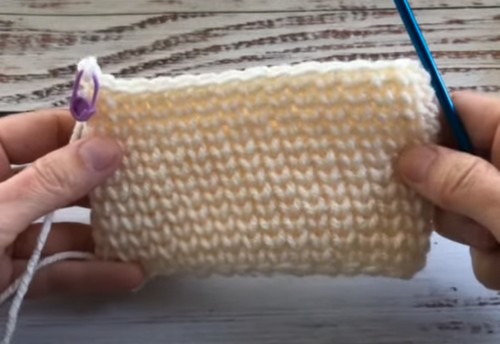
Tip: Use a stitch marker to keep track of your rows and maintain even stitching.
- The waistcoat stitch, often done incorrectly due to misleading tutorials, is traditionally worked in the round but can also be adapted for rows.
- Shows a comparison between the incorrect (tilted stitches) and correct methods (straight stitches).
Understanding the Basics

- Single Crochet Anatomy: Described as resembling the Greek letter Pi, consisting of two legs and a head (or “hat”).
- The waistcoat stitch isn’t worked under the top two loops (the “V”) but is instead worked directly through the center of the stitch.
Common Mistake
- Most crocheters insert the hook correctly through the front but fail to guide the hook correctly at the back.
- Incorrect Method: The hook exits between the two legs and under the head, resulting in tilted stitches.
Correct Method
- Insertion: Start by inserting the hook straight through the center of the stitch from the front.
- Proper Exit Point: Ensure the hook exits under the head but to the side of the two legs at the back.
- From the back, aim for the hook to exit to the left side of the two legs.
- Yarn Over and Pull Through: After positioning the hook correctly, complete your stitch as normal.
- Results: Stitches should align straightly, one on top of the other.
Practice Makes Perfect
- Initially, this technique requires constant checking from the back to ensure correct hook placement.
- With practice, the correct method becomes intuitive, leading to neat and straight waistcoat stitches.
This tutorial emphasizes the importance of where the hook exits on the back of the work, a step often overlooked, resulting in tilted stitches instead of the desired neat, straight appearance of the waistcoat stitch. Practice with attention to this detail will improve both the look and quality of your crochet projects.


