Crochet Spider Stitch Step By Step Guide For Spider Lovers
Jump into the vibrant world of crochet with our lively Crochet Spider Stitch Pattern, an engaging guide to creating intricate, captivating designs effortlessly!
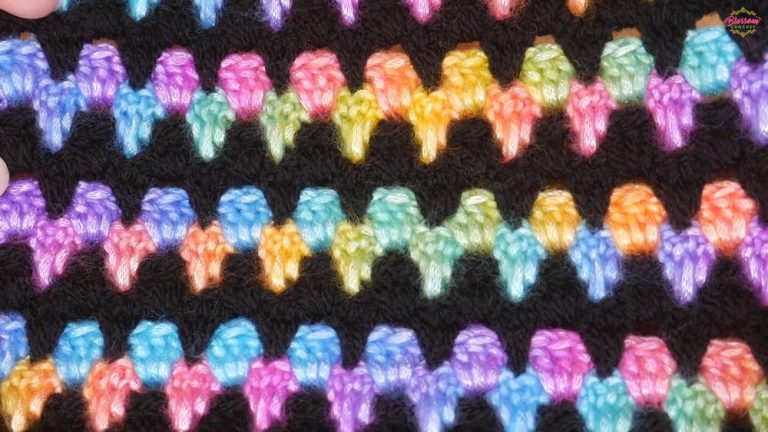
This intricate design captivates with its delicate web-like structure, perfect for adding a touch of sophistication to any project. The spider stitch is made by pairing single crochets and chain spaces to create a fabric that’s dense and textured, perfect for cozy blankets, scarves, or anything that needs a bit of warmth and charm.
Crochet Spider Stitch Guide

Our step-by-step guide ensures that both beginners and experienced crocheters can master this beautiful stitch with ease. Elevate your crochet repertoire and let your imagination weave wonders, welcoming you to a world where tradition meets innovation.
Tip:
Use a lightweight yarn to highlight the detailed beauty of the Spider Stitch, making your patterns stand out with finesse.
Material:
- Yarn of a lighter or brighter color to highlight the stitch definition.
- Crochet hook that matches your yarn weight.
Pattern Instructions:
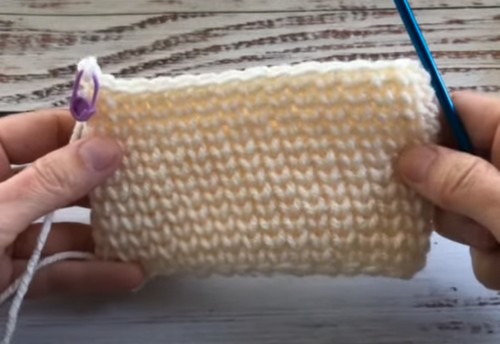
Starting Chain:
- Create a slip knot and chain any odd number of stitches. In the video, 33 chains are made to begin.

Row 1:
- Skip the first two chains from your hook (these skipped chains count as one single crochet).
- In the third chain from the hook, work one single crochet.
- Chain one, then work another single crochet into the same third chain.
- Skip one chain, then in the next chain work one single crochet, chain one, and one more single crochet.
- Repeat this pattern (skip one chain, then work one single crochet, chain one, and one more single crochet into the next chain) across the row until you have two chains left.
- With the last two chains, skip one chain, and work one single crochet into the last chain to finish the row.

For Row 2:
- Chain two (this counts as a single crochet; keep the chains loose to work into later) and turn your work.
- Skip the first stitch (the single crochet from the previous row) and the next single crochet.
- Work into the chain space from the previous row with one single crochet, chain one, and one single crochet.
- Skip the two single crochets and work into the next chain space with one single crochet, chain one, and one single crochet.
- Repeat this pattern across until your last chain space.
- In the final chain space of the row, work one single crochet, chain one, and one single crochet.
- To finish the row, skip the single crochet and work one single crochet into the turning chain.

Row 3 and Beyond:
- Chain two and turn your work (this counts as a single crochet).
- Skip the first two single crochets. Work into the chain space with one single crochet, chain one, and one single crochet.
- Continue this pattern for each chain space across the row.
- At the end of the row, work one single crochet into the turning chain.
- Repeat Row 2 for the pattern until the project reaches the desired size.

(Optional) Straight Edge Finish:
- To create a straight edge on the top (as the bottom edge), you may work a final row of single crochets by chaining one and turning your work, then working one single crochet into each single crochet from the row below and skipping the chain spaces. Repeat across to create a clean and straight edge.