Crochet Rice Stitch Guide Step By Step with Free Pattern
Jazz up your crochet game with the Crochet Rice Stitch Pattern – it’s like giving your projects a cozy hug from a stylish rice grain!
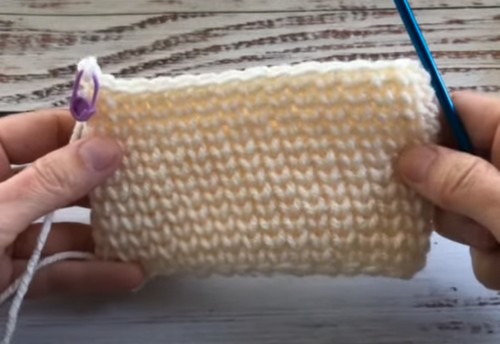
This versatile pattern mimics the appearance of scattered rice grains, creating a beautifully understated and refined look. Perfect for a wide range of uses, the Rice Stitch Pattern adds a touch of class to anything you create. Its unique structure provides both durability and a plush feel, making it suitable for everyday items as well as special gifts.
Crochet Rice Stitch

The vision behind this pattern is to offer crocheters an opportunity to crochet pieces that are both functional and artful, blending traditional techniques with contemporary extra flair of texture.
Tip:
Experiment with different yarn weights to achieve varied textures and effects with the Rice Stitch Pattern.
Material:
- Yarn of your choice
- Crochet hook suitable for your yarn (a larger hook can create a drapier fabric)
- Scissors
- Yarn needle
Pattern Notes:
- The rice stitch is worked in rows.
- It creates a dense, textured fabric that’s the same on both sides, making it reversible.
- Typically, this stitch is worked by alternating between front post double crochet (fpdc) and back post double crochet (bpdc).
- You should know how to chain (ch), half double crochet (hdc), front post double crochet (fpdc), and back post double crochet (bpdc).
Getting Started:

Foundation Chain:
- Begin by making a foundation chain in an odd number of stitches. This will depend on the width of your project.
Row 1:
- Start the first row by working a half double crochet (hdc) in the third chain from the hook and in each chain across. Turn your work to start the next row.
Row 2:

Step 1:
- Chain 2 (counts as your first half double crochet).
Step 2:
Front post double crochet (fpdc) around the next stitch. This is done by yarning over, inserting your hook from the front to the back and then to the front again around the post of the next stitch, yarn over and pull up a loop, yarn over and draw through two loops, yarn over and draw through the remaining two loops.

Step 3:
- Back post double crochet (bpdc) around the next stitch. Yarn over, insert your hook from the back to the front and then to the back again around the post of the next stitch, yarn over and pull through, yarn over and draw through two loops, then yarn over and draw through the remaining two loops.
Step 4:
Repeat Step 2 and Step 3 alternately across the row, ending with a hdc in the turning chain from the previous row.

Row 3 and Beyond:
Repeat Row 2 for the pattern. Each row begins with a ch 2 (counts as hdc), followed by alternating fpdc and bpdc stitches, and ends with a hdc in the last stitch.

Finishing:
- Once you’ve reached the desired length of your piece, you can finish by cutting the yarn, pulling it through the last stitch securely, and weaving in the ends with a yarn needle.