Crochet Innocent Hippo Amigurumi Pattern Step By Step Guide
Turn up the charm of the free crochet Innocent Hippo Amigurumi pattern with its delightful design, perfect for crafters seeking an adorable and unique project.
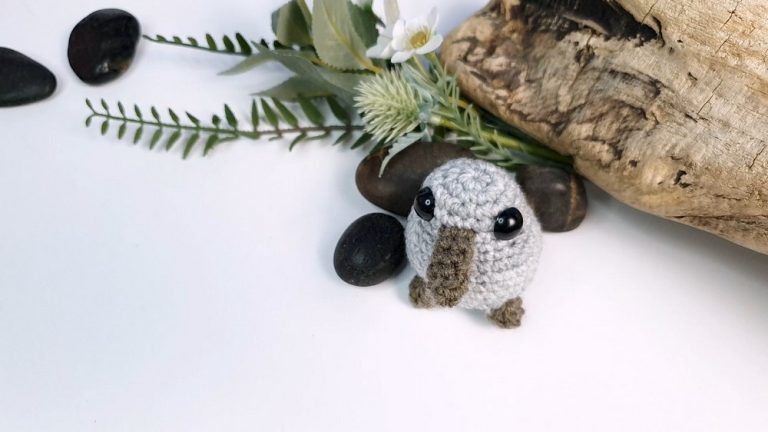
This delightful pattern turns soft grey yarn into a cute little cuddly hippo, featuring a beautifully rounded body that’s perfect for hugging. The hippo’s ears are small and perky, adding a touch of whimsy and making it even more endearing. Its mouth is designed with a gentle, almost smiling curve, giving it a sweet and gentle expression that is sure to melt hearts.
Crochet Hippo Amigurumi Pattern

This amigurumi piece is not just a toy; it’s a charming décor item for nurseries and a unique handmade gift that showcases your crafting skills. The pattern is designed with user-friendly instructions, making it accessible even for beginners while still offering a satisfying challenge for seasoned crocheters. Crocheting this hippo can also be a relaxing way to reduce stress, providing both creative fulfillment and a charming finished product.
Supplies:
- Super bulky yarn (weight category 6) in color fog
- 8mm crochet hook
- Thin black and gray cotton or acrylic yarn for details
- Darning needles (curved recommended)
- Stuffing material
- Two 12mm safety eyes
- Gray felt sheet (optional for patches)
- Sewing pins, lap counter, stitch markers, sewing clips
Instructions:
Muzzle:
- Start with a magic ring and 6 single crochet (sc) in the ring. Close the ring incrementally.
- Round 2: 6 increases (inc) – (12 stitches at the end)
- Round 3: [3 inc, 3 sc] repeat twice (18 stitches at the end)
- Round 4: [3 inc, 6 sc] repeat twice (24 stitches)
- Round 5: [3 inc, 9 sc] repeat twice (30 stitches)
- Round 6: 1 sc in each stitch
- Round 7: [3 decreases (dec), 9 sc] repeat twice (24 stitches)
- Round 8: [4 dec, 5 sc, 4 dec, 3 sc] (16 stitches)
- Cut yarn and make an invisible finish.
For nostrils, use 13 inches of yarn to create bumps by passing it vertically through two stitches several times.
Ears (make 2):
- Magic ring with 6 sc in the ring.
- Round 2: [1 sc, 1 inc] repeat three times (9 stitches)
- Finish, leave a tail for sewing, flatten the ear bottom, and create shape by sewing.
Head:

- Start with a magic ring and 6 sc in the ring.
- Repeat steps as for the muzzle up to Round 5.
- Round 6 to 13: 1 sc in each stitch
- Round 14: [3 dec, 9 sc] repeat twice (24 stitches)
- Place safety eyes.
- Round 15 to 17: Continue with decrease patterns as per the video, stuffing the head progressively.
Arms (make 2):
- Start with a magic ring and 6 sc in the ring.
- Round 2: 6 inc (12 stitches)
- Repeat rounds with sc and decrease patterns as per the video.
- Stuff only the hand, leave a tail for sewing.
Legs and Body:

- Begin as for arms, follow increase and decrease patterns to create legs.
- Connect legs with chain stitches and continue with the body, stuffing it scantily.
- Sew the body close to the legs to give the hip a proper shape.
Patches (optional):
Cut circles from gray felt, and sew on as described in the video for decorations under the feet and as a heart on the body.
Assembly:
Sew all parts together as instructed in the video, using stitch markers and pins to help position parts before final sewing.
The video includes visibility markers (like yarn strings and wooden sticks) to help you properly place ears, eyes, and other parts at the right positions. It advises slow sewing and careful positioning for a neat finish, as well as the option of using pins before making permanent stitches.
If you want to adorn your crocheted hippo with clothes, the video creator refers you to her Etsy shop for purchasing additional patterns for items like a tutu or raincoat.
Be sure to stuff the crocheted pieces as indicated for the right shape and don’t overstuff to ensure the clothes will fit. The tutorial also contains tips like using safety eyes properly, and when to insert stuffing.