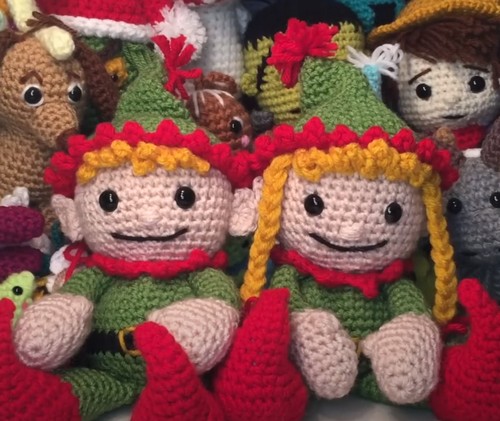
Step-by-Step Guide to Crochet an Elf Amigurumi – Free Pattern
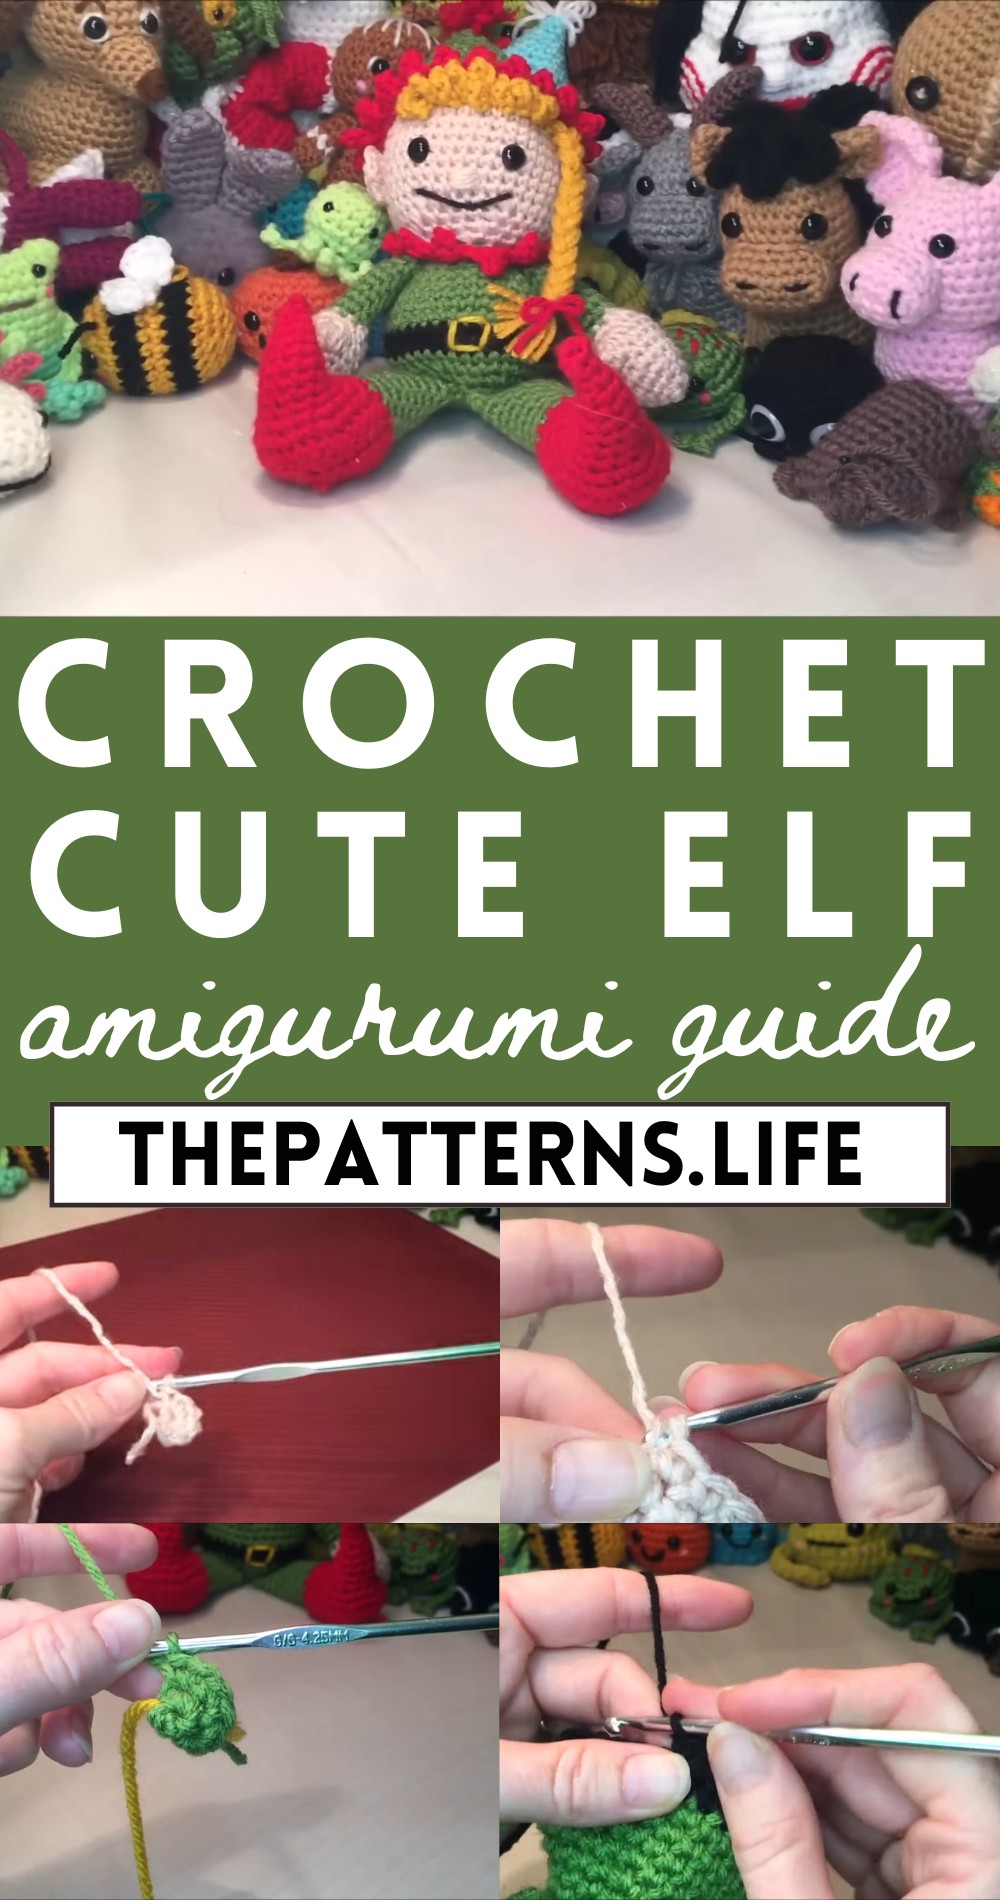
Mash your holiday decor with charm using our free crochet Elf Amigurumi. This delightful pattern is perfect for adding a touch of festive elegance to any space.
A season where your home boasts a touch of handmade beauty with creativity of your mind. This delightful little pattern marries simplicity and whimsy, providing you with a fun way to personalize your festive decorations. Perfect for beginners and seasoned crocheters alike, the pattern’s straightforward instructions ensure that crafting your own elf is a breeze. Use it as a cute ornament, a unique gift, or even a playful addition to your seasonal displays.
Crochet Elf Amigurumi Pattern
The benefits are manifold—engage in a relaxing and enjoyable activity, create lasting memories, and fill your home with a sense of warmth and creativity. Each adorable elf, crocheted with care, becomes a testament to your ingenuity and adds a magical, handmade touch to your holiday festivities.
Materials:
- Number 4 medium weight yarn
- 4.25 mm crochet hook (also known as a size G hook)
- 12 mm or 14 mm safety eyes (14 mm eyes suggested)
- Stuffing material
- Stitch marker
- Darning needle
Instructions:
Arms (Make 2):
Row 1:
- Create a loop, chain 1 (ch 1).
- 6 single crochets (sc) into the loop.
- Use the tail to pull the center closed.
Row 2:
- 6 increases (inc) around (2 sc in each stitch) for a total of 12 stitches.
For Row 3:
- 2 sc, 1 inc, repeat around for a total of 16 stitches.
Rows 4 to 6:
- 16 sc around for three rows consecutively (total of 48 stitches – flip marker at each set of 16).
Row 7:
- Double crochet cluster (four stitches into the same stitch) and then 15 sc remaining.
For Row 8:
- 2 sc, 1 decrease (dec), repeat around for a total of 12 stitches.
Row 9:
- 1 sc, 1 dec, repeat around for a total of 8 stitches.
For Rows 10 to 18:
- 8 sc around for nine consecutive rows (72 stitches total – flip marker at each set of 8).
- Add a little stuffing to the arm.
Close the arm:
- Fold in half and sc across through both sides for 3 stitches.
- Cut the yarn leaving a tail for sewing.
Legs (Make 2):
- Similar to the arms, start by making a magic circle with a chain 1 (start with a tail to shape the shoe if you desire).
- Follow a pattern of increases followed by rounds of sc until you form the foot and leg.
Head and Body:
- Start the head with a magic circle and 6 sc.
- Follow a pattern of increases until you reach the desired size for the head, then continue with several rounds with no increases to form the head shape.
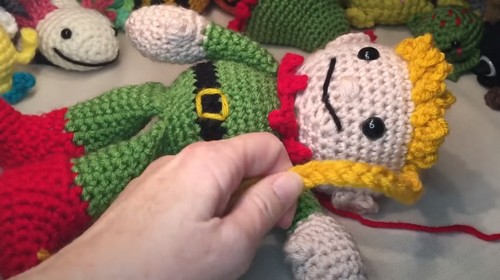
- Place the safety eyes and stuff the head.
- Begin decreasing rounds to shape the bottom of the head, changing color to begin the body.
- Add arms by crocheting them in as you work on the body rounds (expect 18 sc around once arms are added).
- Continue the body with sc rounds, switching colors for the belt.
- Add the legs in a similar way to the arms.
Hat:
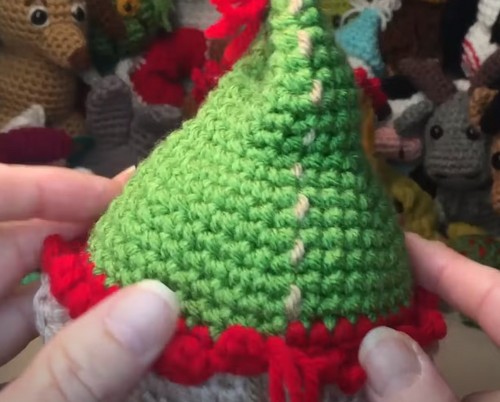
- Create a cone-shaped hat with increasing rounds starting from a magic circle.
- Switch colors for the brim of the hat and use a special frill pattern to finish the edge.
Finishing:
- Sew ears, nose, and a mouth onto the face.
- Stuff the body and close up the final opening.
- Attach the hat to the head.
- You can optionally add more details such as a belt buckle or outfit decorations.
Notes:
- This pattern is designed to be a crochet along, meaning the viewer is expected to follow along with the video for every stitch and row.
- The pattern instructions are given in brief for the first 30 seconds of every new row on the screen.
Important:
- Remember to use a stitch marker to track the start of each round.
- Always count your stitches to ensure that each row has the correct number.
- Adjust stuffing for shaping as needed, ensuring that the head and limbs are appropriately firm and that the body can sit up straight.