Crochet Camel Stitch Guide Step By Step – Pattern
It is a comprehensive resource perfect for enthusiasts eager to expand their skill set. This guide introduces a variety of stitches, each detailed with clear instructions and step-by-step visuals, making it easy. Whether you’re aiming to fashion a cozy throw, snuggly blankets or a stylish accessory, this pattern guide enables the creation of pieces with unique textures and designs.
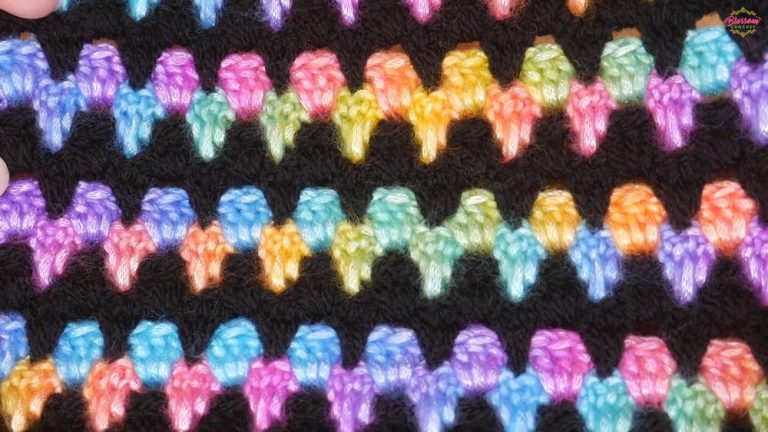
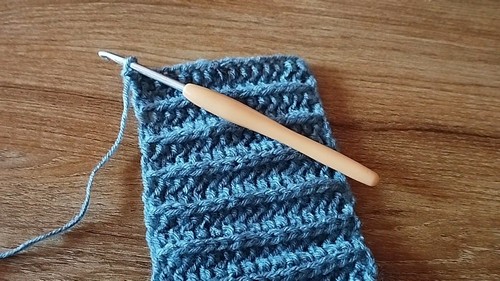
Crochet Camel Stitch

The stitches featured are not only aesthetically pleasing but also functional, enhancing the durability and beauty of your projects. By mastering these techniques, you gain the confidence to let your creativity shine, allowing you to experiment with colors and designs like never before.
Tip:
Always use a yarn weight that complements your chosen stitch to ensure your project’s texture and appearance are consistent and appealing.
Materials:
- Medium weight yarn (the brand mentioned is ‘Winter King’)
- 4 mm crochet hook
Starting the Pattern:
- Make a slip knot.
- Chain a number to start (in the example, 18 chains are made).
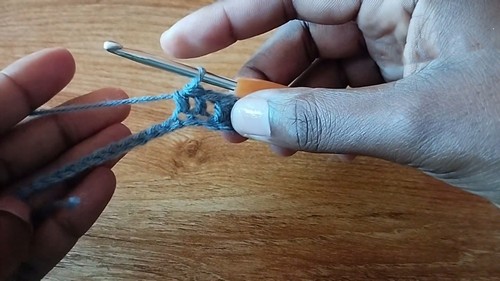
Row 1:
- Skip the first chain from the hook.
- Make a half double crochet in the next chain.
- Continue to half double crochet in each chain until the end of the row.
Row 2:
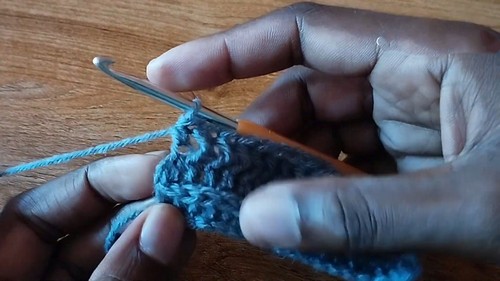
Chain 1 and turn your work.
- Identify the loops of the stitches:
- The front loop
- The back loop
- The third loop (found below the top two loops on the front side of the work when working in rows)
- Yarn over and make half double crochets into the third loop for each stitch across until you reach the last stitch.
Last Stitch of Row 2 and Every Row:
On the last stitch of every row, make a half double crochet into the top two loops instead of the third loop to keep edges straight and firm.
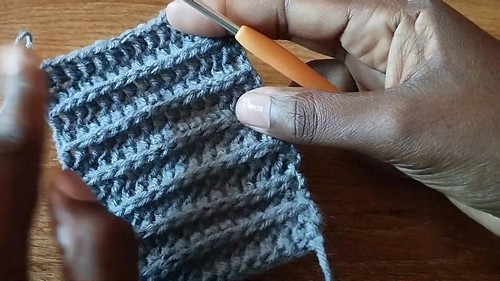
Row 3 (and all subsequent rows):
- Chain 1 and turn your work.
- Making the first stitch can reveal the third loops more easily for the rest of the row.
- Repeat the pattern of half double crochets into the third loop for each stitch across to the last stitch.
- Make the last half double crochet into the top two loops.
- Chain 1 and turn to continue with the next row.
Difference When Working in Rounds:
When working in rounds, the third loop is found on the inside of the project. You would work into the third loop on the inside for each stitch, pushing the top two loops to the outside and creating a different texture compared to working in rows.
Ending a Round:
- Once completed with the round, slip stitch to the first stitch to join the round.
Final Notes:
- When working in rows, the braided-like ridges appear on the outside, while in rounds, the ridges appear closely knit and lie on the outside.
- The technique results in a stretchy texture ideal for projects like blankets, sweaters, and scarves.