
Crochet A Spiral Stitch Guide Step By Step For Home Decor
Master the Crochet Spiral Stitch Pattern, perfect for creating visually stunning and dynamic designs in everything from blankets to hats.
It is a captivating technique that adds a dynamic swirl to your crochet projects. This stitch pattern is perfect for those looking to infuse their work with movement and visual interest. The process involves crocheting in continuous rounds, which results in a seamless and flowing design, ideal for items like afghans, rugs, and hats.
Crochet A Spiral Stitch Guide
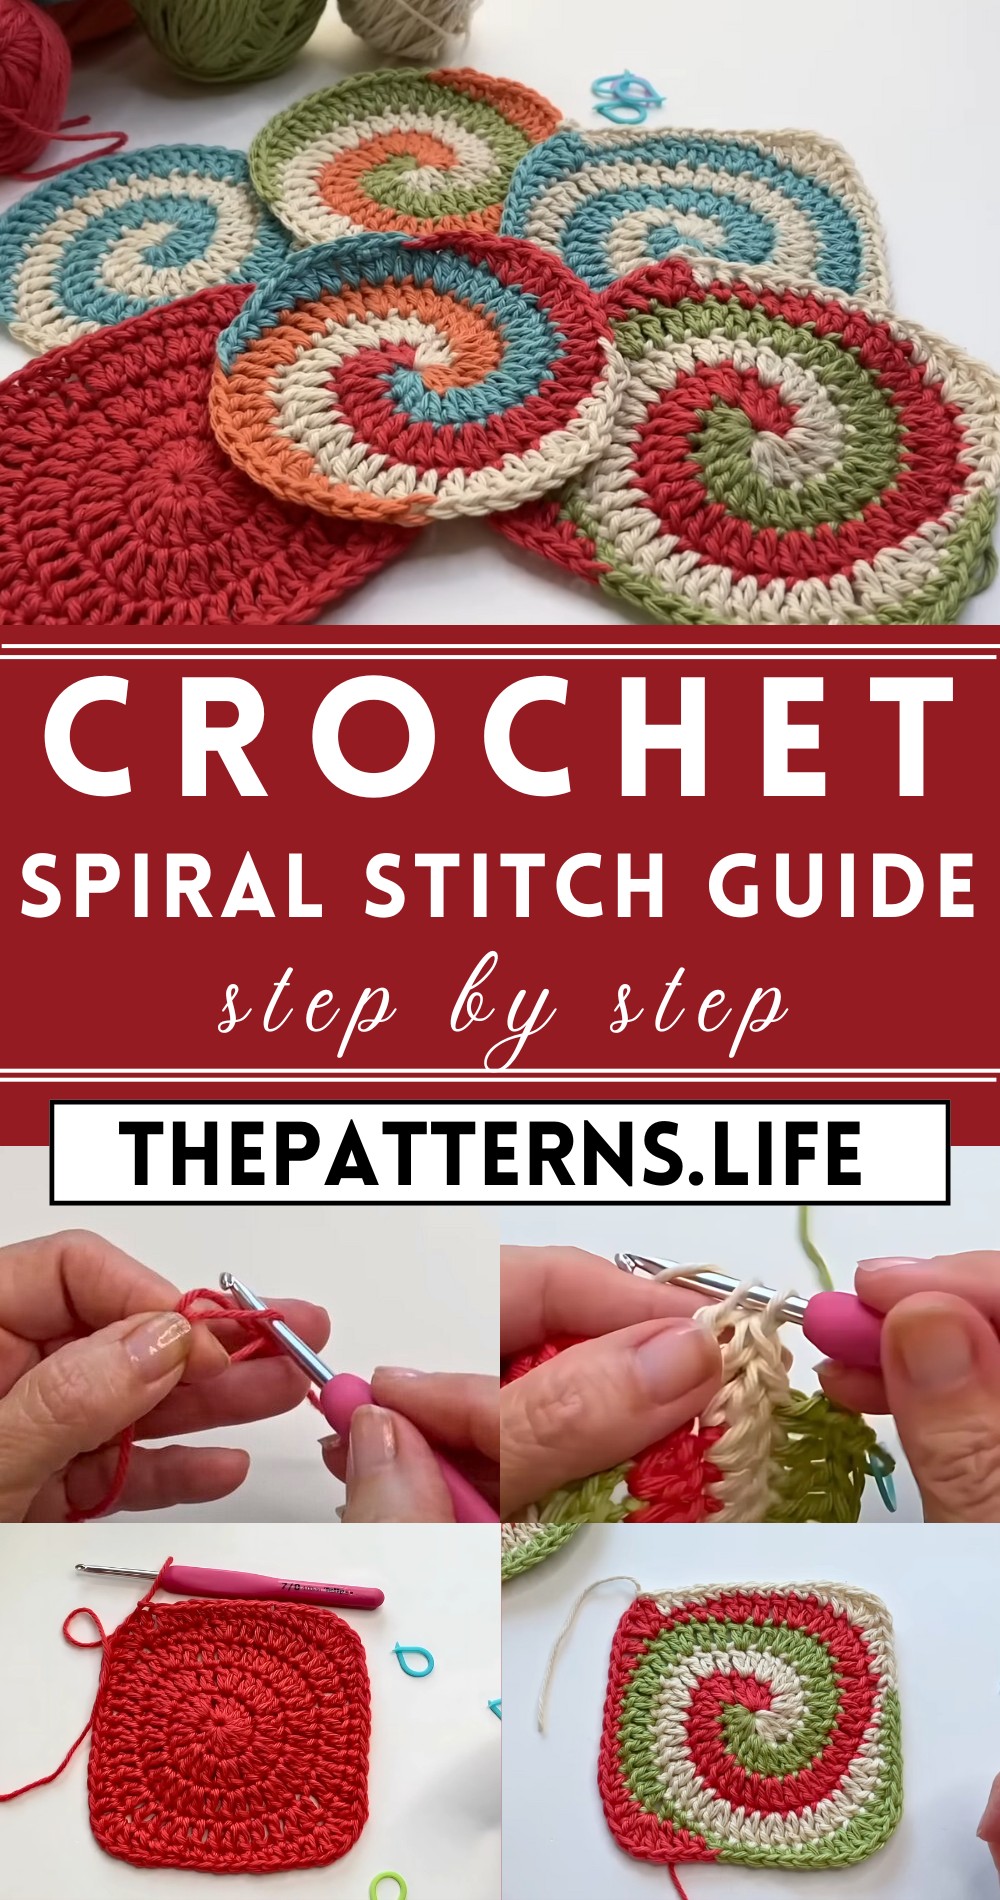
The spiral effect not only brings an engaging texture but also an optical illusion that fascinates and delights. Mastering this stitch enhances the visual appeal of your creations, making them stand out in any setting. Additionally, this pattern offers the flexibility of various color combinations, opening up endless possibilities for creativity.
Tip:
Opt for contrasting color schemes to make the spiral pattern more pronounced and eye-catching, boosting the overall appeal of your project.
Introduction
- Explains how to work spirals from one color to four.
- Transform a circle into a square.
- Foundation techniques for all spirals are shared, emphasizing working with the number 12 and a classic increase sequence.
Materials and Preparation
- Use of stitch markers is highly recommended.
- Each spiral starts with 12 stitches and follows a specific increase pattern to expand the circle.
- The tutorial uses double crochets for the spirals, with single and half double crochets to start the spiral effect.
Starting Your Spiral

- Initial Circle
- Begin with a magic ring or a chain four and slip stitch to form a ring.
- Start your first round with 12 stitches, broken down into two single crochets, two half double crochets, and eight double crochets.
- This combination creates the initial spiral effect.
- Increase Rounds
- For larger spirals, increase in multiples of 12 (e.g., 24, 36, 48 stitches).
- Follow a classic increase pattern:
- Round 2: Two double crochets in each stitch (doubling your stitch count).
- Round 3: One double crochet and an increase (two double crochets) in the next stitch, repeated around to build to the next multiple of 12.
- Round 4 and Beyond: Continue with the pattern (two double crochets and an increase, three double crochets and an increase, etc.), increasing the circle size as desired.
- Closing the Spiral Circle
- Use half double crochets and single crochets to taper the circle down, based on the last increase sequence.
Adding More Colors

- Two-Color Spiral
- Split the initial 12 stitches between the two colors, starting with a magic ring or a chained circle.
- Work the increase pattern with both colors, always starting a round with the same color you began the last round.
- Three-Color Spiral
- Divide the 12 stitches into sets of 4 for each color.
- Follow the same increase pattern, adding a new color after completing the sequence with the previous color.
- Four-Color Spiral
- Divide the initial round into sets of 3 stitches per color.
- Increase in the same manner, each time starting with the same order of colors and using the set increase pattern.
Transforming the Spiral into a Square
- After completing your desired spiral size, you can turn it into a square.
- Divide the total stitch count by 4 to determine the placement of corners.
- Add three double crochets in each corner to create the square shape.
- Use a combination of double crochets, half double crochets, and single crochets to straighten the sides between corners.
Final Tips
- Always ensure you finish a round with an increase according to the pattern.
- Utilize stitch markers to keep track of the start and end of rounds, and corner placements when transitioning from a circle to a square.
- Experiment with color changes and sequences to create unique spiral designs.
This comprehensive step-by-step guide based on the video tutorial provides all the necessary information to crochet a spiral stitch, from the initial setup to transforming it into a square.


