Cute And Funny Crochet Screaming Opossums Pattern For Valentines Day Decor
Stylish and decent, our free crochet Screaming Opossum offers an amusing and unique project, adding character and charm to your crochet collection.
With detailed instructions, this project suits both beginners and experienced crocheters. The finished opossum plushie becomes a conversation starter, a whimsical desk toy, or a humorous gift for friends and family. As you crochet this unique design, you’ll find relaxation and skill improvement, gaining a sense of accomplishment with each finished piece.
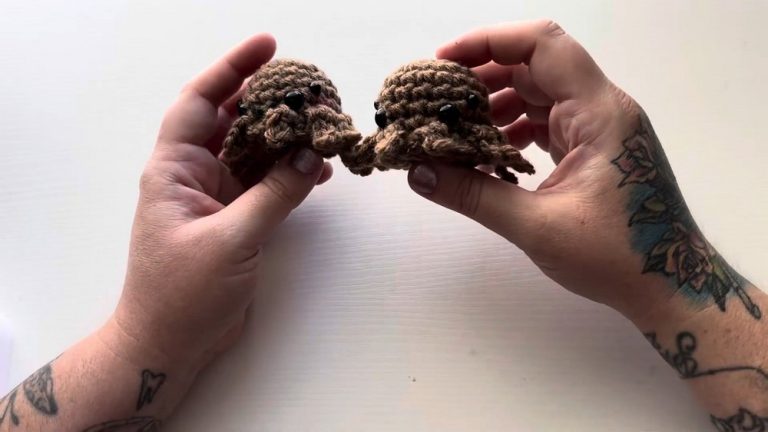
Crochet Screaming Opossums

Its expressive and playful appearance makes it an adorable addition to any crochet collection, sure to bring a smile to anyone who sees it. Grab your yarn and hooks, and enjoy the delightful process of bringing this amusing character to life. It’s a wonderful way to add a touch of whimsy to your day and share laughter with others.
Materials Needed:
- 8 ply 100% acrylic yarn in several colors: main gray, dark gray, white, pink, darker pink/red.
- Pair of 20 mm safety eyes.
- 3.5 mm crochet hook.
- Stitch markers or pins.
- Yarn needle and scissors.
- Stuffing material.
- Optional: Weight (e.g., small quartz piece).
Colors:
- Main body: Gray.
- Ears and legs: Dark gray.
- Face and belly: White.
- Feet, tail, and mouth: Pink.
- Tongue: Darker pink or red.
Stitches and Techniques:
- Magic ring.
- Single crochet (SC), including in back loop only (BLO) and front loop only (FLO).
- Increase (inc) and invisible increase.
- Decrease (dec), including SC3 together.
- Double crochet (DC) in FLO.
- Chain 2 picot.
Pattern Overview:

Body:
- Start with a magic ring of 6 SC in gray.
- Continue with rounds of increases and work in continuous spirals to form a potato-like shape.
- Incorporate white yarn for the belly using SC in BLO for a textured appearance.
- Use color changes to detail the belly and texture patterns throughout.

Face:
- Begin with a magic ring in pink for the nose, switching to white.
- Create a rounded shape, increasingly expanding in rounds to form the base of the face.
- Switch to gray yarn towards the top to blend with the body.
- Add detailed stitching for the facial features, ensuring alignment with the body when attached.

Mouth Interior:
- Start with a pink magic ring for the top inside mouth, gradually increasing in size.
- Add white teeth details using SC and chain 2 picot stitches, ensuring they project outward.
- Assemble and attach to the main face piece, aligning pink areas.

Ears:
- Work in dark gray starting with a magic ring and follow with increases and slip stitches to form the ears’ rounded shape.
Feet and Tail:

Feet:
- Begin with pink for the paws, switch to dark gray for the legs, making sure they are symmetrical.
Tail:
- Start with a magic ring in pink, continue in spirals, adding a bend to shape.
Assembly:
- Attach the ears, eyes, and all body parts according to the video instructions, ensuring the posture and expression of the opossum.
- Add the weight (if using) inside the body for stability.
- Sew all parts together carefully, paying attention to the positioning for a screaming expression.
Final Touches:
- Fill the body with stuffing to the desired firmness.
- Use the tail and feet positions to express the opossum’s “screaming” stance.
- Adjust the mouth openness to suit the screaming look, sewing securely in place.